|
|
|
E-mail > Metro Provider Email Transition and POP3 Setup
ThunderbirdThis article will show you how to configure Thunderbird to use your metroprovider.com email address.
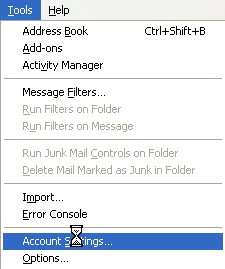
- Click on Tools at the top, and select Account Settings.
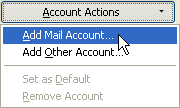
- In the Account Settings window, click on Account Actions (found in the lower left corner), and the Add Mail Account.
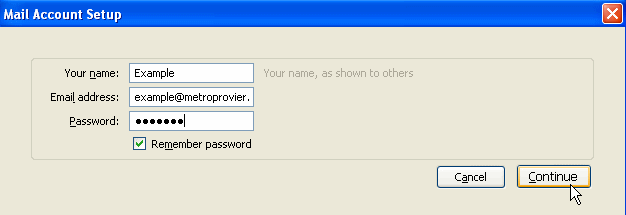
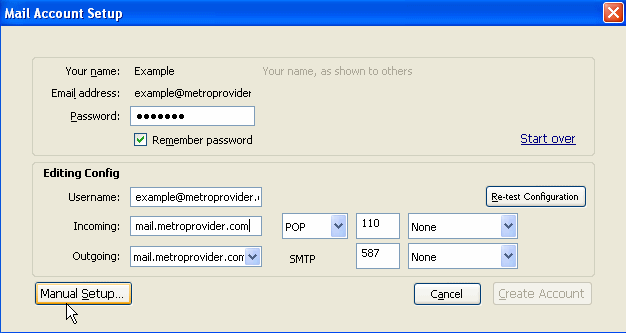
- Enter your name, email address, and email password.
- Click Continue.
- At this point, Thunderbird will attempt to automatically configure your account, stop this process by clicking Stop.
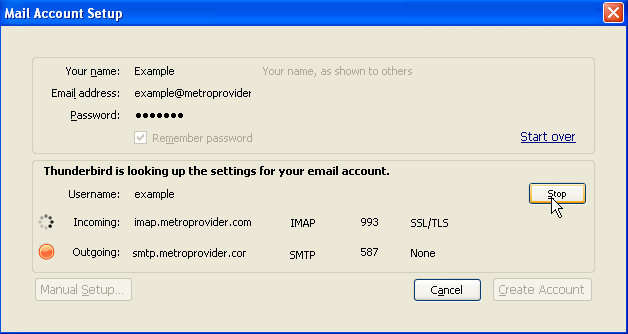
- In the lower section put your email address in the Username: field.
- In the box next to Incoming:, put in mail.metroprovider.com. Make sure the next section is set to be POP, the one to the right of that should say 110, and the box next to that should be set to None. Change these sections as necessary by first clicking in them and then entering or selecting the appropriate value.
- In the box next to Outgoing:, put in mail.metroprovider.com. Make sure the next section is set to be SMTP, the one to the right of that should say 587, and the box next to that should be set to None. Change these sections as necessary by first clicking in them and then entering or selecting the appropriate value.
- Click on Manual Setup... in the lower left corner.
|
Did this Frequently Asked Question provide the information you were looking for? Provide us with your
Feedback and suggestions for improving this FAQ.
|
|